Learn how to tile in under 10 minutes
If you’ve never personally tiled anything before, you probably won’t know this, but the tiling is the easy part. It’s the research before you get started that’s the real kicker.
What are you tiling over? Can you tile over existing tiles? How does tiling a bathroom differ from tiling a floor? You will most likely find yourself typing these kinds of queries into Google for hours on end… unless you have a cheat sheet like this one to get you started in just minutes.
First things first…
Going gung-ho and ordering those expensive tiles you’ve been pining for on a whim can really come back to bite you, especially if it turns out you bought too many, paying more than you had to, or even worse, that you bought too little and now have to buy more. The only way to avoid this nightmare is to do your due diligence and calculate the square meterage of the space you want to tile.
In the past this meant breaking out the measuring tape and warming up your maths skills. Things can get pretty complicated. But luckily for you, you live in the digital era where an app can do it all for you. We recommend Canvas on iPad, RoomScan for Iphone, Apple’s ARKit or MagicPlan on Android. And just like that: you’ve saved yourself minutes, or maybe even hours. You simply need to attach the Occipital’s Structure sensor to your iPad and then download the Canvas app.
Choices, choices, choices
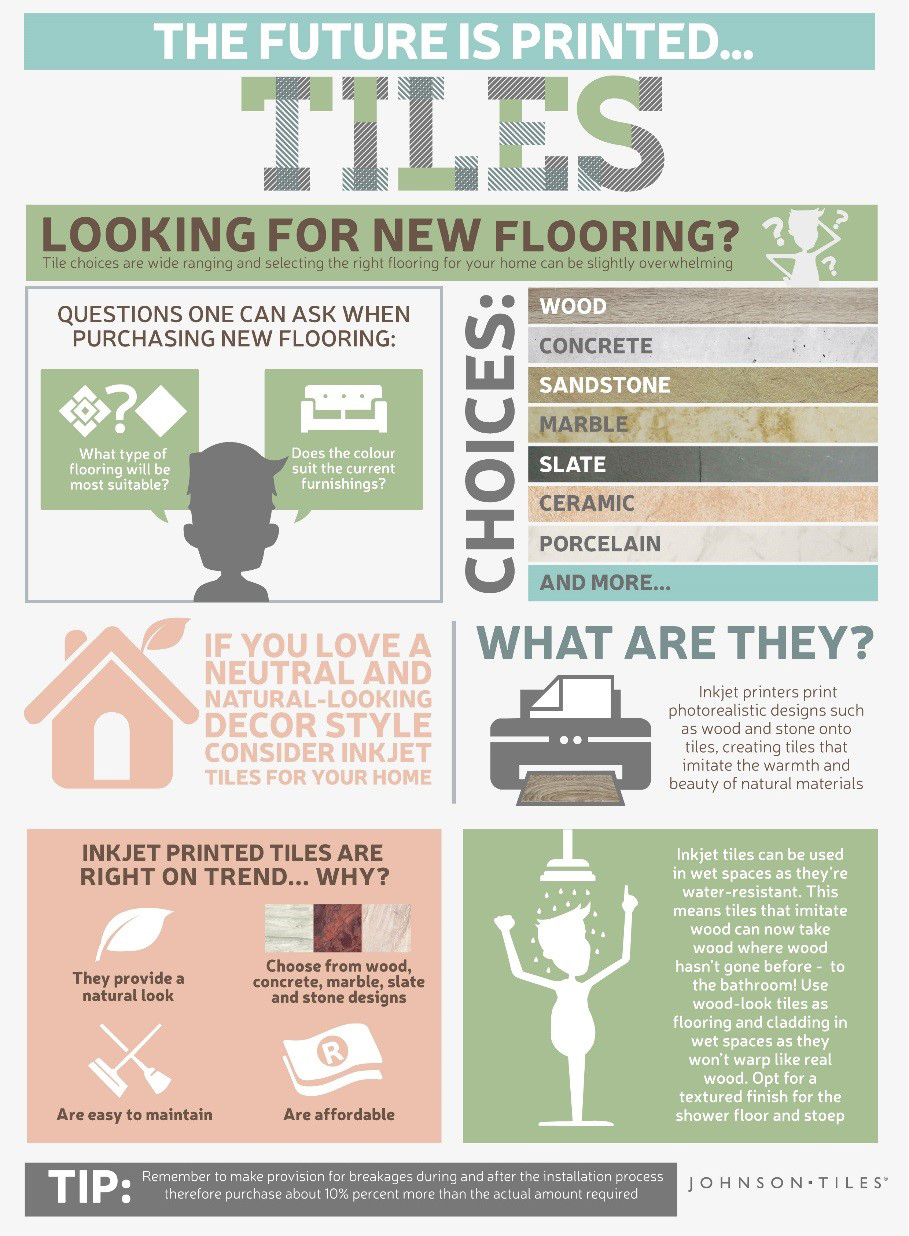
Now you can order the tiles, right? Wrong. Selecting the right tiles is about more than just the colour. How big should the tiles be? Are they for the floor or the walls? What room will they be used in? There are a number of things to consider.
Now it’s time to choose tiles. This part, you probably don’t need too much help with: you’ve been Pinteresting for months already. However, there may be a few options you haven’t considered yet. Have a peek at this informative infographic and assess your options, or take our quiz to discover your ideal collection
The right tools for the right job
These tiles won’t stick themselves to the floor or wall, so here’s everything you’ll need in your toolbox to get the job done:
- Adhesive
- Adhesive trowel
- Bucket
- Dust mask
- Grout
- Grout sponge
- Knee pads
- Mixing paddle
- Profile gauge (to measure curved areas)
- Rubber mallet
- Spirit level
- Spreader
- Tile cutter
- Tile markers
- Tile nipper (for wall tiles)
- Tile spacers
You will need to keep in mind that the tile you choose will impact what adhesive and grout you should use. TAL offers some excellent selection guides here and here to help you along.
14 simple steps to tiling
Now you're finally ready to get your hands dirty. Just follow the easy steps in TAL’s instruction guide, for the perfect floor tiling installation every time.